Guided tutorial on how to use GraphQL with Flutter
Let's learn how to configure and consume a GraphQL endpoint in a Flutter application by creating a blog application.
GraphQL is an API query language developed by the Facebook team to improve the traditional REST API pattern by providing a more efficient and flexible way of requesting and retrieving data from an API.
With GraphQL, you can retrieve only the needed data rather than a large payload of irrelevant data. This results in faster and more efficient API requests, particularly on devices with limited network bandwidth.
GraphQL in FlutterAnchor
Flutter is changing how developers approach cross-platform development. Its fast and dynamic suite of widgets allows developers to create stunning and responsive apps for mobile (iOS and Android) and desktop (MacOS and Windows) with a single codebase. It's natural to want to leverage the power of GraphQL when working with a popular and efficient tool like Flutter, and this article will show you how.
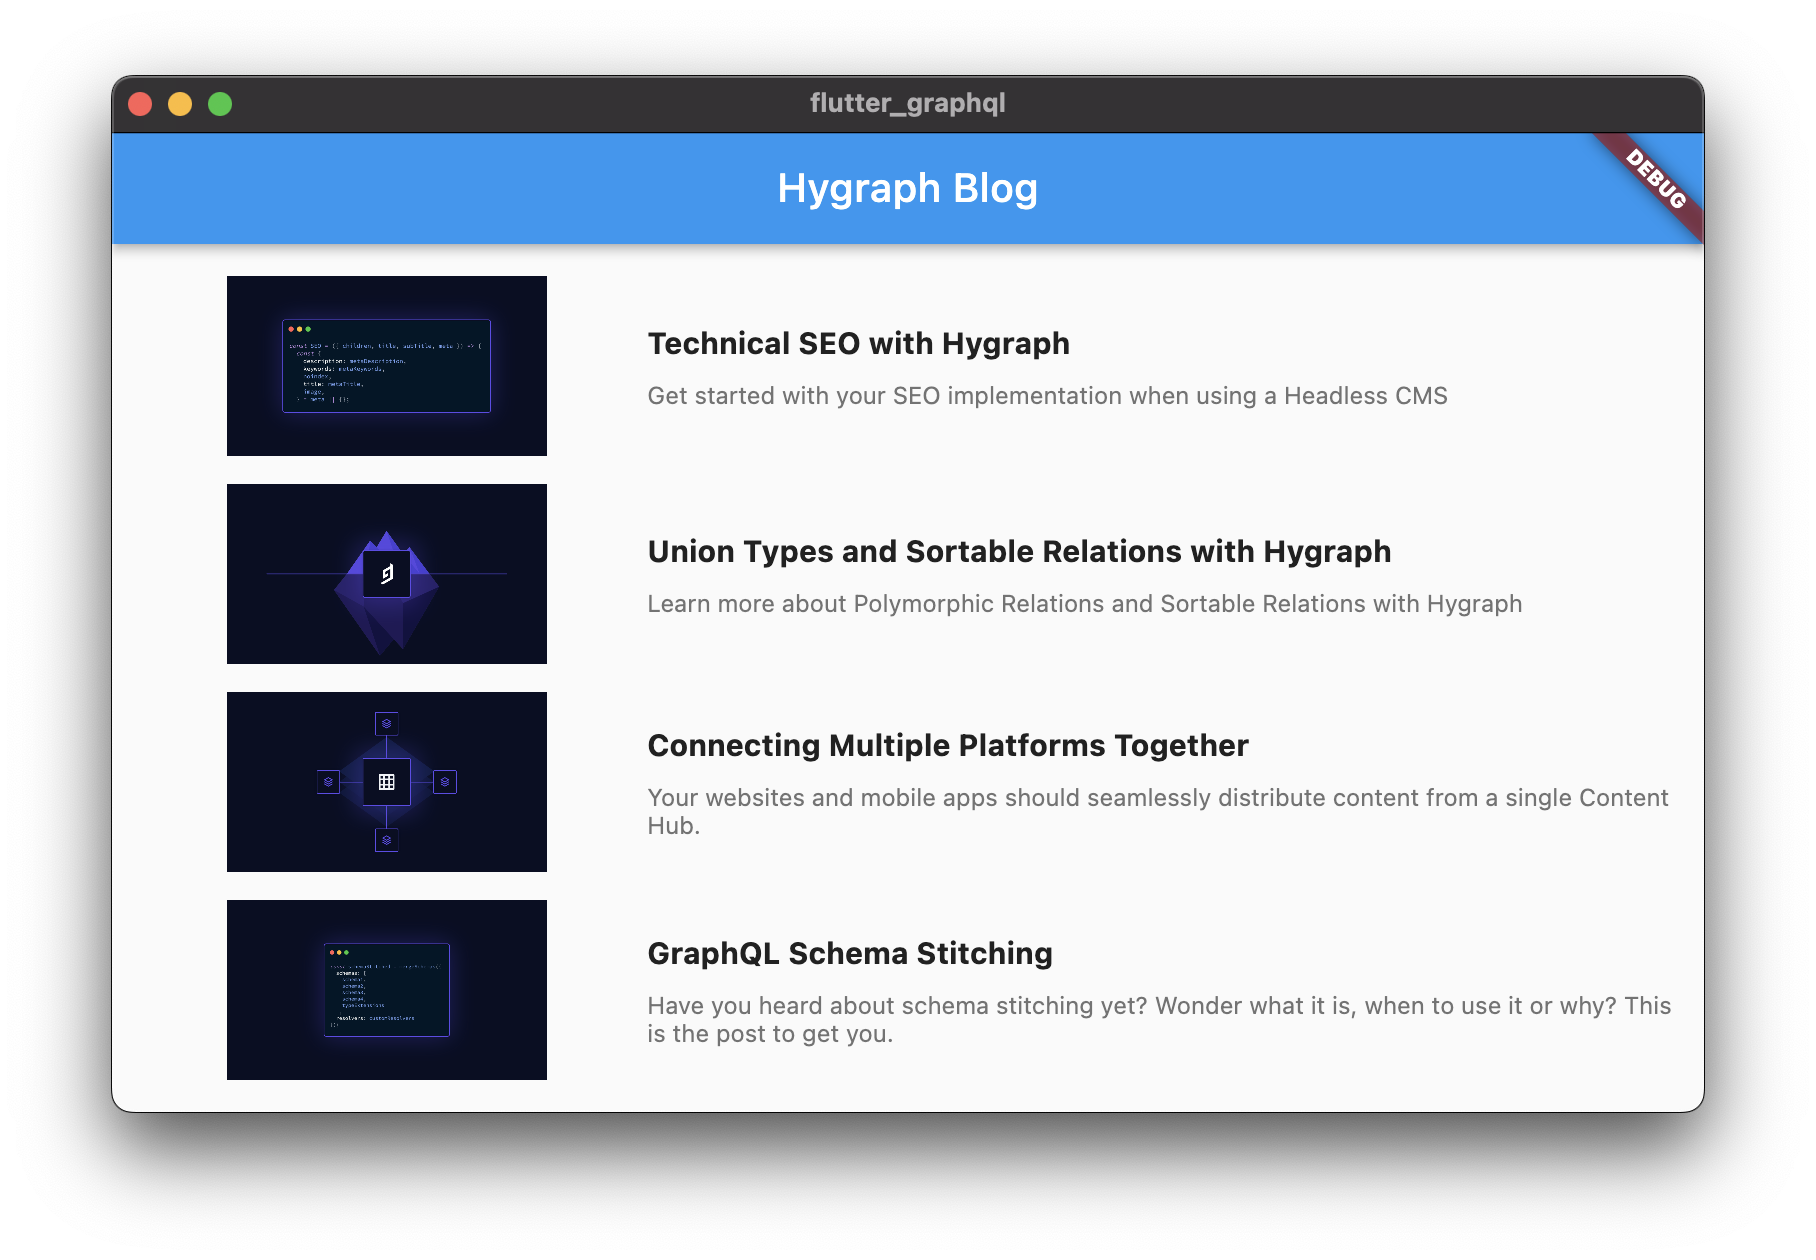
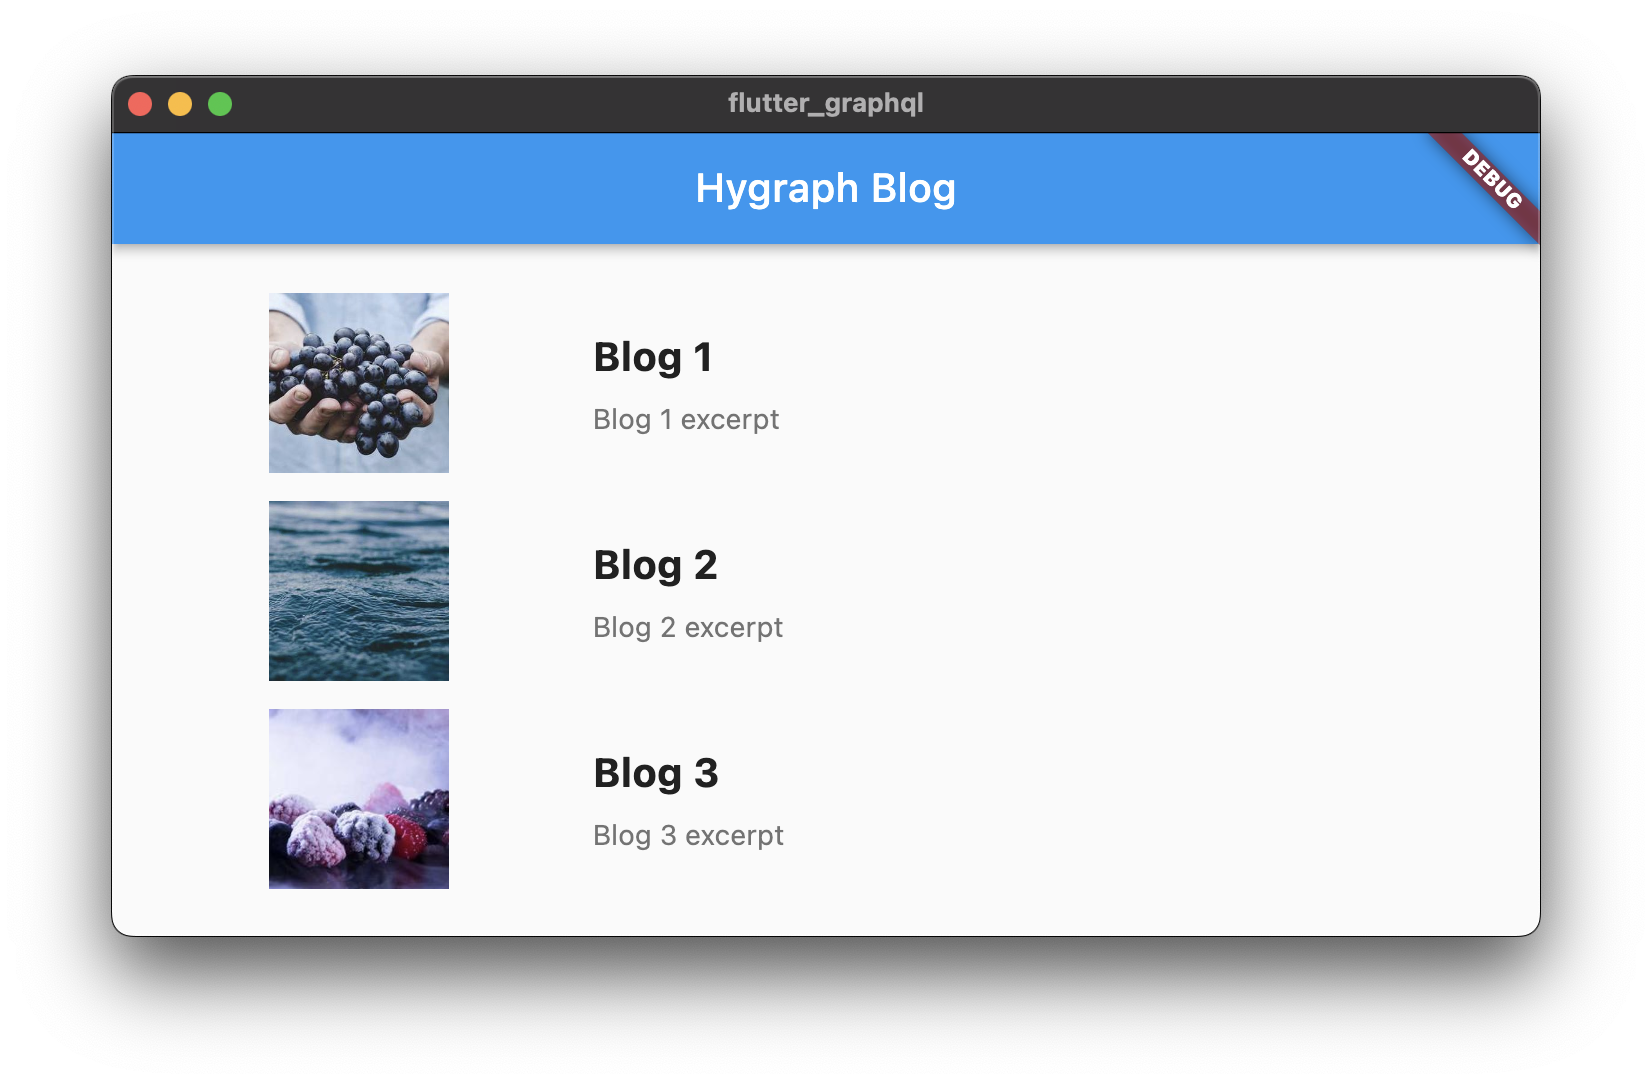
This article will cover how to configure and consume a GraphQL endpoint in a Flutter application by creating a blog application. We'll use the GraphQL Flutter package for this operation and Hygraph for our GraphQL api endpoint. Here's a preview of what our final output will look like once we're finished.
PrerequisitesAnchor
To follow along with this tutorial, the following prerequisites are required.
What is graph_flutter?Anchor
As previously stated, graph Flutter provides an easy way to interact with GraphQL in a Flutter application. It has a set of widgets that make it easy to build queries, perform mutations, and handle the results in a Flutter app. As we'll see in later sections of this article, some advantages that make it a popular package include its ease of use and customisation options.
Setting up your GraphQL endpointAnchor
To begin, you must create your GraphQL endpoint. Hygraph offers a simple solution; all you need to do is create a new project, create your content schema, add contents as desired, and your GraphQL endpoint will be generated automatically.
In addition, Hygraph includes an interactive GraphQL playground within the app. You can add a remote source to pull data from other services or manually add data to the Hygraph interface and generate GraphQL endpoints.
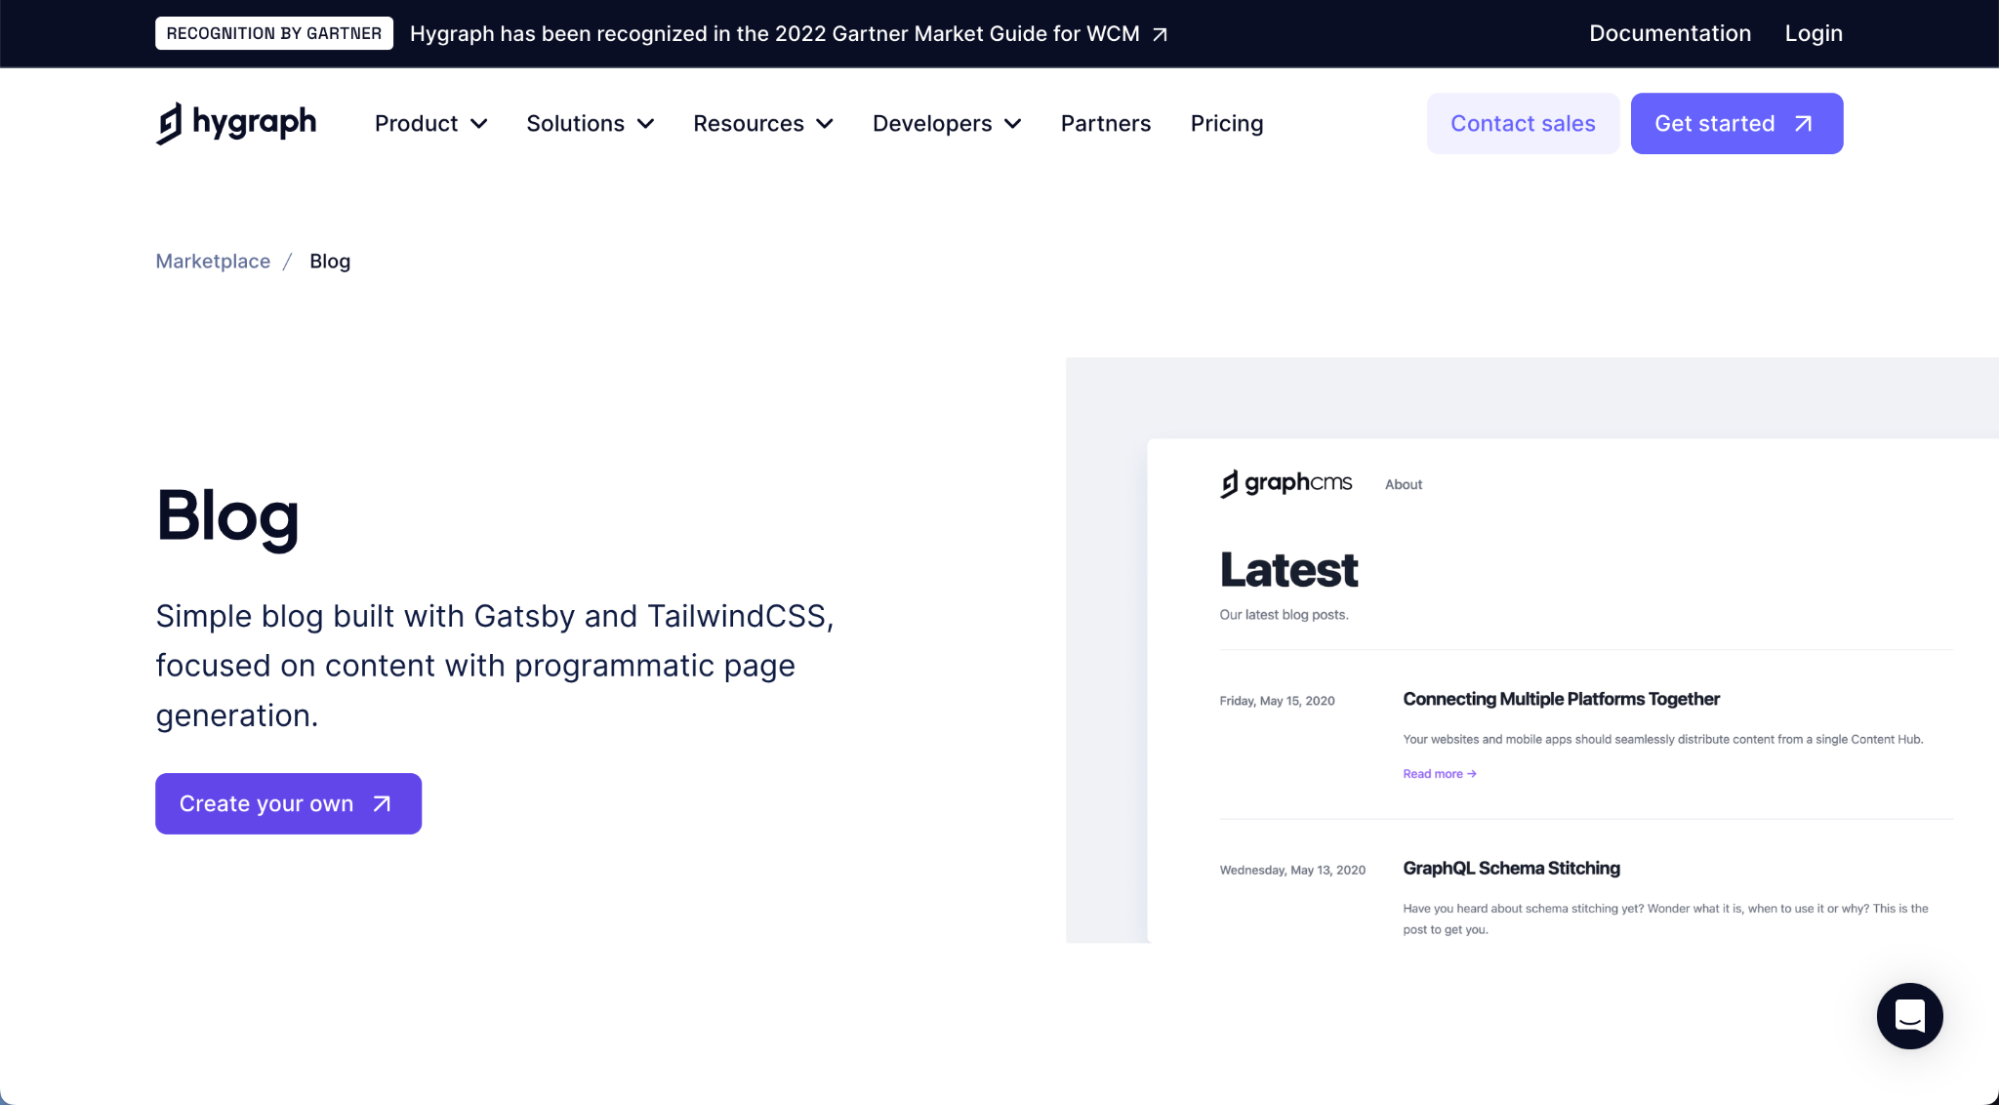
To proceed, clone the Hygraph starter blog template, which includes the necessary schema and sample contents for a blog site. Once you’re on this page, you should see the following output; to proceed, click the Create your own button, as shown below.
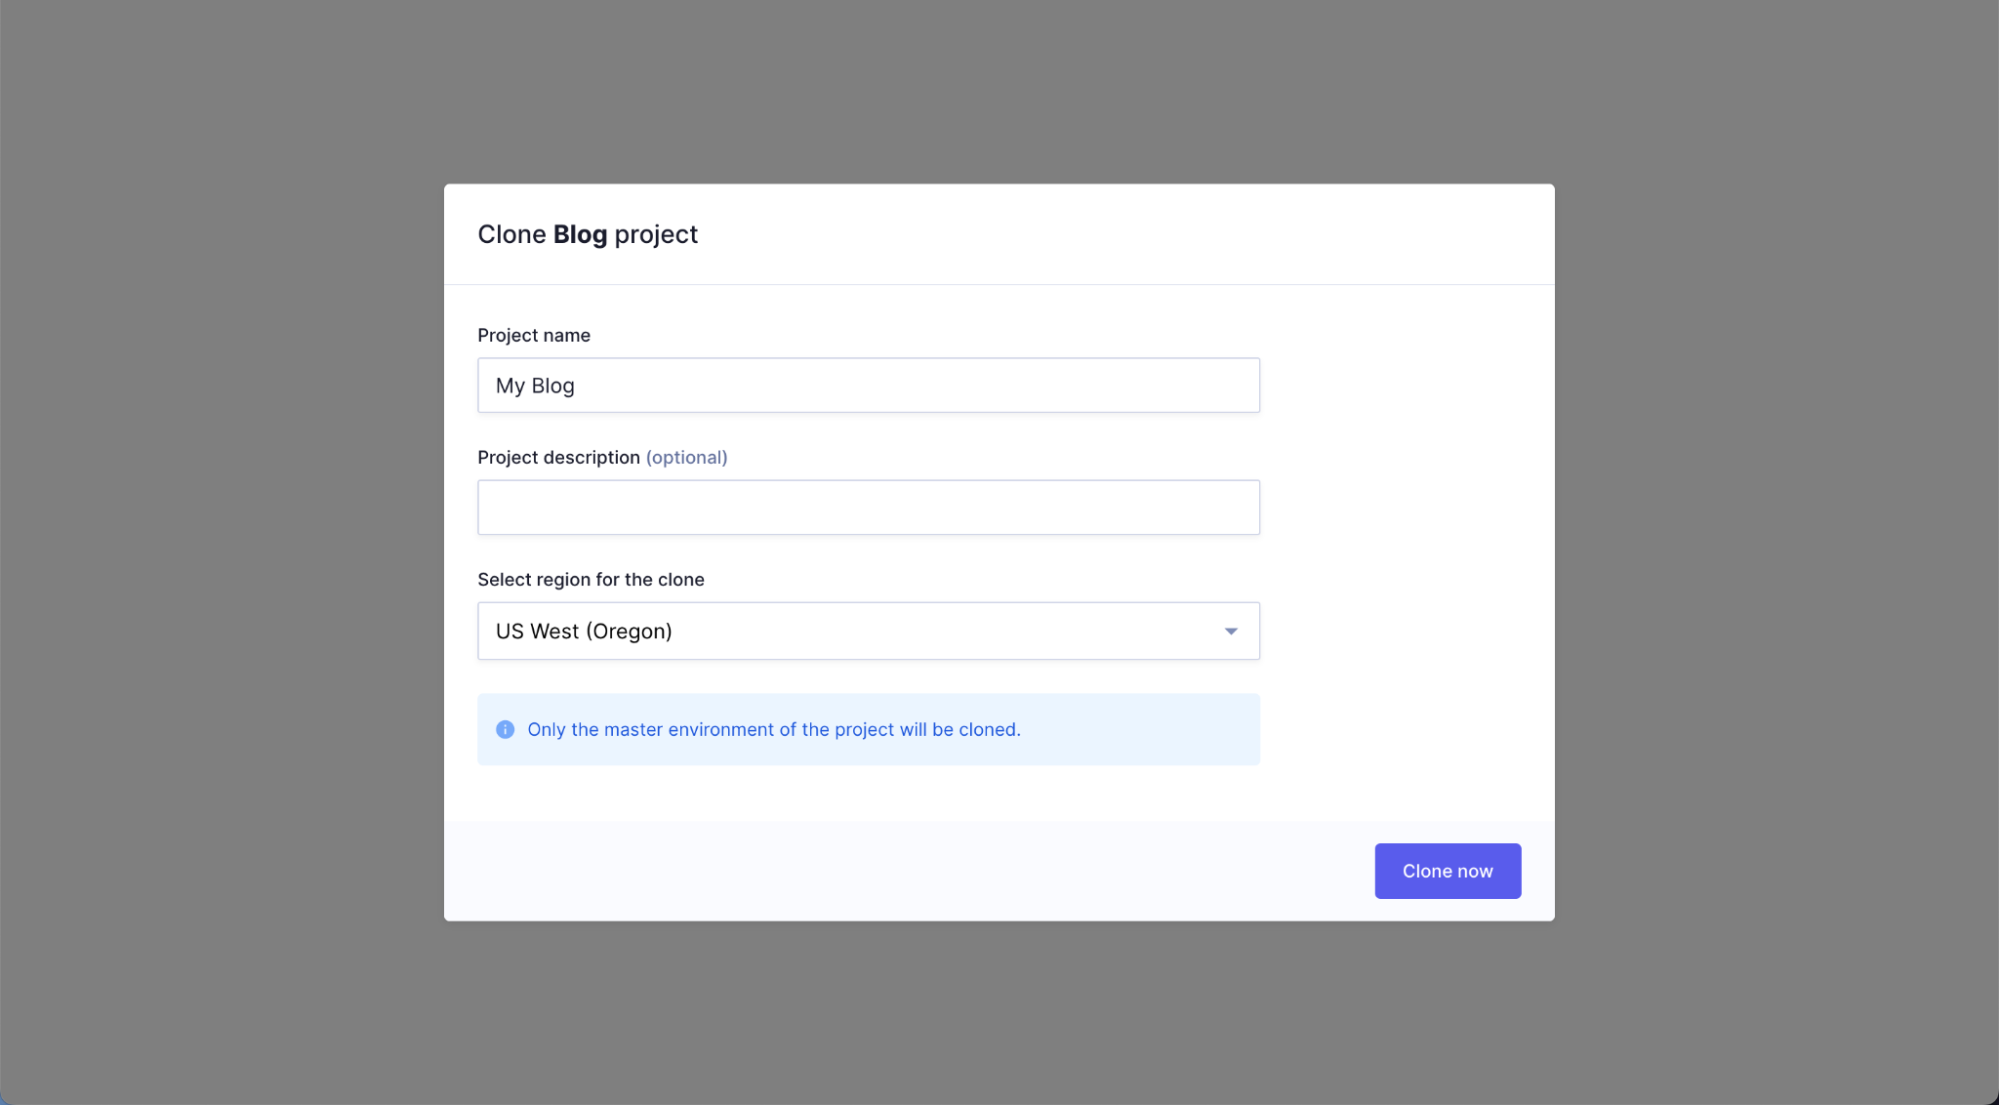
On the next page, you'd be asked to enter your project details and choose a server region. Fill out the form as desired, then click the Clone now button to continue.
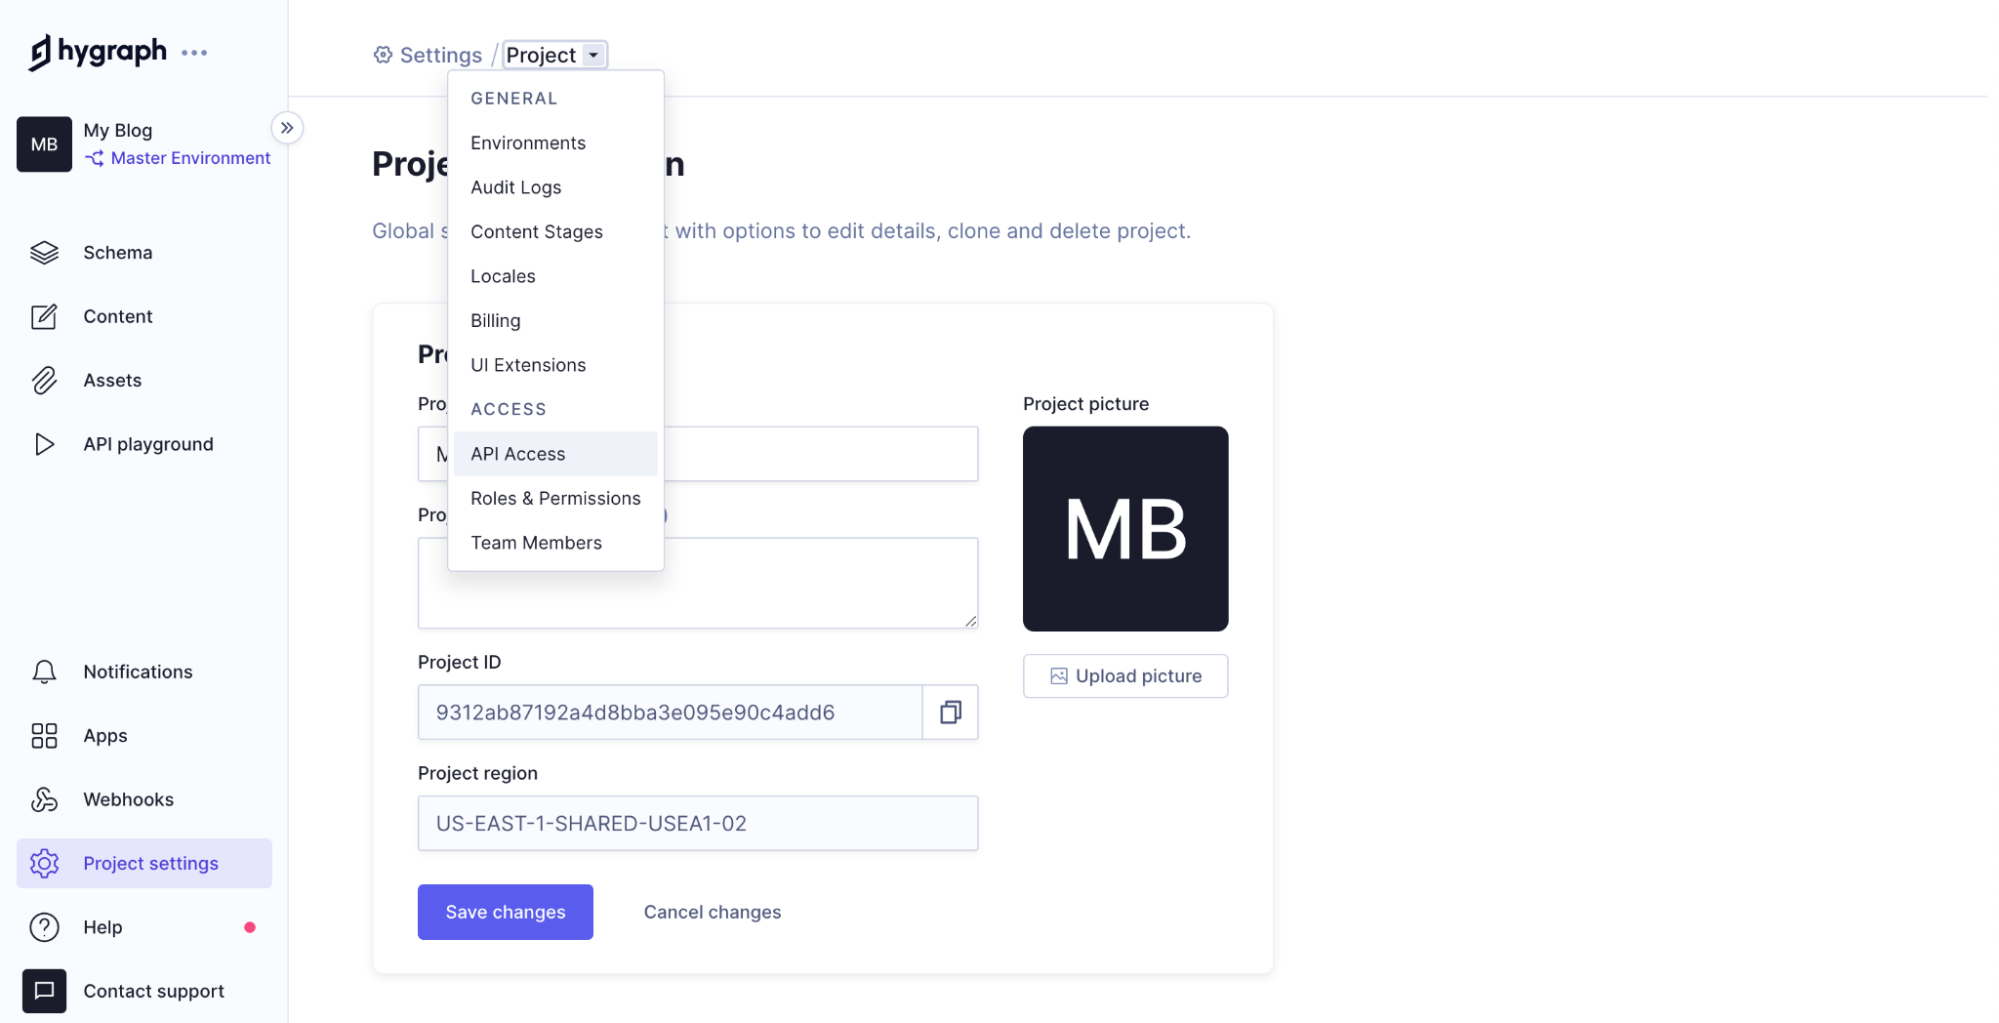
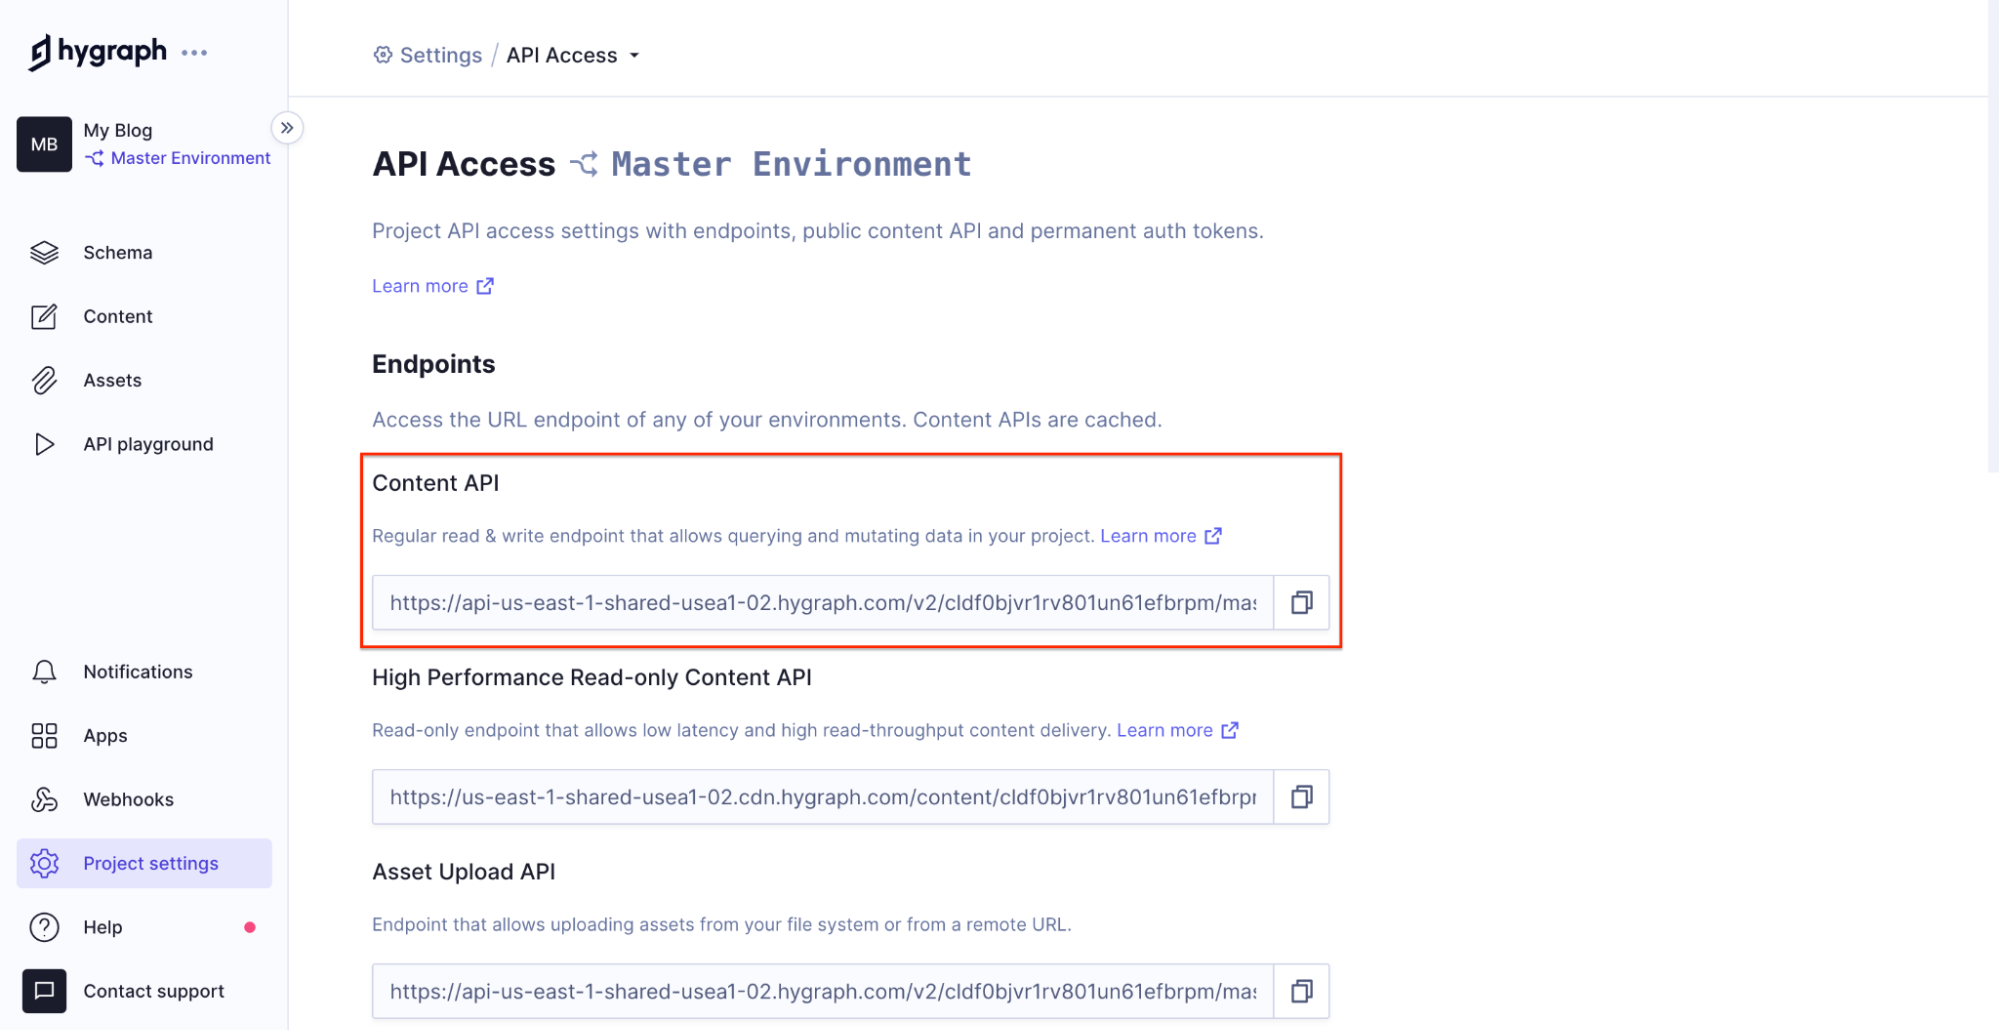
After a few seconds, your project should be ready. Navigate to the Project Settings page on your new project page and select the API Access option, as shown below.
In the API Access page, you can manage the different endpoints for your project and set permissions as desired. However, we are only concerned with the Content API; copy the URL in this field and save it somewhere safe — this is our GraphQL endpoint.
How to use GraphQL in FlutterAnchor
Let’s proceed with creating a new Flutter application by running the command below:
flutter create flutter-graphql
Running this command should scaffold the default button click counter app for us. Next, create a new file named blog_row.dart in the default /lib directory, and paste the code below into it:
import 'package:flutter/material.dart';class BlogRow extends StatelessWidget {final String title;final String excerpt;final String coverURL;const BlogRow({Key? key,required this.title,required this.excerpt,required this.coverURL,}) : super(key: key);Widget build(BuildContext context) {return Padding(padding: const EdgeInsets.all(8.0),child: Row(children: [Expanded(flex: 1,child: coverURL != null? Image.network(coverURL): const FlutterLogo(),),Expanded(flex: 2,child: Column(crossAxisAlignment: CrossAxisAlignment.start,children: [Text(title,style: Theme.of(context).textTheme.headline6,),const SizedBox(height: 10,),Text(excerpt,style: Theme.of(context).textTheme.bodyText2,),],),),],),);}}
In the preceding code, we initialized a stateless widget called BlogRow, which uses the built-in Row(), Expanded(), and Text() widgets to create a layout displaying a single blog information - including the blog title, excerpt, and cover image.
To proceed, replace the default lib/main.dart file's content with the code below.
import 'package:flutter/material.dart';import 'blog_row.dart';void main() {runApp(const MyApp());}class MyApp extends StatelessWidget {const MyApp({super.key});Widget build(BuildContext context) {return MaterialApp(title: 'Hello World',theme: ThemeData.light(),home: Scaffold(appBar: AppBar(title: const Text("Hygraph Blog",),),body: ListView(children: const [BlogRow(title: 'Blog 1',excerpt: 'Blog 1 excerpt',coverURL: 'https://picsum.photos/200',),BlogRow(title: 'Blog 2',excerpt: 'Blog 2 excerpt',coverURL: 'https://picsum.photos/200',),BlogRow(title: 'Blog 3',excerpt: 'Blog 3 excerpt',coverURL: 'https://picsum.photos/200',),],),),);}}
The main change we made to this file was to import the BlogRow() widget we created earlier. We then used the ListView() widget to render BlogRow three times, displaying different information for each iteration.
If we run our application at this point, we should get the output shown below.
Implementing GraphQLAnchor
To begin, we must first install the graphql_flutter package:
flutter pub add graphql_flutter
We can then import it into our application (e.g. lib/main.dart) using the following code:
import 'package:graphql_flutter/graphql_flutter.dart';
After importing the GraphQL Flutter package, the first step is to configure our GraphQL client and choose a preferred cache method using the GraphQLClient() widget, as shown in the code below. Also, replace the httpLink with the URL you copied earlier from your Hygraph project.
final HttpLink httpLink = HttpLink("https://YOUR_GRAPHQL_URL");final ValueNotifier<GraphQLClient> client = ValueNotifier<GraphQLClient>(GraphQLClient(link: httpLink,cache: GraphQLCache(),),);
Following that, we must wrap our root widget in a GraphQLProvider widget and pass in the GraphQL client that we created earlier.
. . .class MyApp extends StatelessWidget {const MyApp({super.key});Widget build(BuildContext context) {// Wrapping root widget with GraphQLProviderreturn GraphQLProvider(client: client,child: MaterialApp(. . .)),);}}
Once this is done, we can begin running GraphQL queries, mutations, or subscriptions from anywhere in our application.
QueriesAnchor
In GraphQL, queries are used to retrieve data from a server and request specific fields from that data. They allow us to specify exactly what data we require, reducing over- and under-fetching.
The graphql_flutter package includes a Query() widget that allows us to run queries on demand, as shown below.
Query(options: QueryOptions(document: gql(YOUR_QUERY),variables: const <String, dynamic>{"variableName": "value"}),builder: (result, {fetchMore, refetch}) {// do something with result}),
As demonstrated above, the Query() widget accepts two parameters:
options: to specify the query to run and variables to pass to the query, this must also be wrapped in theQueryOptions()widget.builder: to keep track of the query's status and the data returned.
To see GraphQL queries in action in a Flutter application, open the lib/main.dart file and replace its content with the following code.
import 'widgets/blog_row.dart';import 'package:flutter/material.dart';import 'package:graphql_flutter/graphql_flutter.dart';void main() {runApp(const MyApp());}final HttpLink httpLink = HttpLink("https://YOUR_GRAPHQL_URL");final ValueNotifier<GraphQLClient> client = ValueNotifier<GraphQLClient>(GraphQLClient(link: httpLink,cache: GraphQLCache(),),);const String query = """query Content{posts{idtitleexcerptcoverImage {url}}}""";class MyApp extends StatelessWidget {const MyApp({super.key});Widget build(BuildContext context) {return GraphQLProvider(client: client,child: MaterialApp(title: 'GraphQL Demo',theme: ThemeData(primarySwatch: Colors.blue,),home: Scaffold(appBar: AppBar(title: const Text("Hygraph Blog",),),body: Query(options: QueryOptions(document: gql(query),variables: const <String, dynamic>{"variableName": "value"}),builder: (result, {fetchMore, refetch}) {if (result.isLoading) {return const Center(child: CircularProgressIndicator(),);}if (result.data == null) {return const Center(child: Text("No article found!"),);}final posts = result.data!['posts'];return ListView.builder(itemCount: posts.length,itemBuilder: (context, index) {final post = posts[index];final title = post['title'];final excerpt = post['excerpt'];final coverImageURL = post!['coverImage']['url'];return BlogRow(title: title,excerpt: excerpt,coverURL: coverImageURL,);},);}),)),);}}
Here, we defined a query to retrieve available published posts from our Hygraph GraphQL client. We limited the query to only obtaining each post's id, title, excerpt, and cover image URL. Furthermore, we rendered the returned data using the built-in ListView() and our custom BlogRow() widget.
If we run our application at this point, we should get the output shown below.
MutationAnchor
A mutation is an operation that allows you to modify data on a GraphQL client; unlike a query, a mutation is used to create, update, or delete data. The GraphQL Flutter package also includes a Mutation() widget, which works similarly to the Query() widget, as shown below.
// . . .const String updatePostMutation = """mutation {updatePost(where: { id: "ckadrcx4g00pw01525c5d2e56" }data: { author: "Elijah Asaolu" }) {idnameprice}}""";// . . .Mutation(options: MutationOptions(document: gql(updatePostMutation)),builder: (runMutation, result) {return TextButton(onPressed: () {final result = runMutation({});// Do something with result},child: const Text('Update Author Name'),);})// . . .
As demonstrated above, we created a mutation that updates the author of a given post, and this mutation is triggered whenever we click a button. You'll also notice that the Mutation() widget accepts the same parameters as Query(), with the exception that we're using MutationOptions() to pass the options in this case.
SubscriptionAnchor
Subscriptions in GraphQL are similar to queries, but unlike queries, subscriptions allow us to subscribe to real-time updates from a GraphQL API. The graphql_flutter package also includes a subscription widget, which we can use, as shown below.
const String newPostSub = """subscription newPost {post(where: {mutation_in: [CREATED]}) {node {idtitlecontentcreatedAt}}}""";Subscription(options: SubscriptionOptions(document: gql(newPostSub)),builder: (result) {if (result.isLoading) {return const Text("Loading");}return Text(result.data!["post"]["title"]);})
The preceding code is configured in such a manner that when a new post is created, we are retrieving its data in our Flutter application.
Leverage the power of GraphQLAnchor
Hygraph is the ultimate solution for modern content management, leveraging the power and flexibility of GraphQL. With Hygraph, you can easily manage and distribute your content to any platform, device, or application.
Furthermore, the Hygraph GraphQL API makes it easy to access and manipulate your content in real-time, without needing to manage complex data structures or write extensive code. Its user-friendly interface and streamlined workflows enable you to easily manage your content and collaborate with your team, whether you're a content creator, marketer, or developer.
ConclusionAnchor
We've covered how to get started with consuming a GraphQL endpoint in a Flutter application using the GraphQL Flutter package, and we've created a sample application that fetches content from a GraphQL endpoint provided by Hygraph for demonstration purposes. I've also uploaded the simple blog application to GitHub for your convenience.
