Connect your Hygraph project to Mux
Mux is a platform dedicated to solving all video-related problems that software teams may have, including live-streaming, video chat, on-demand video catalog, etc.
What you can do with the Hygraph-Mux integrationAnchor
With this app you can quickly launch video features, customize player experience, and monitor video streaming performance.
Prerequisites to use this integrationAnchor
- You must have a Hygraph account. If you don't have one, you can create one here.
- You must have a Hygraph project with at least one model.
- You must have a Mux account. If you don't have one yet, you can get one here.
- You must have your Mux
Access tokenandToken secret. You can create these keys by navigating to Settings > Access Tokens in your Mux account. - You must have access to your
Signing key IDand theBase64-encoded Private Keyto be able to useSigned URLoption for your videos. You can create these keys by navigating to Settings > Signing keys in your Mux account.
Apps are environment specific. This means their configuration is applied per environment. Take this into consideration if you're working with a project using more than one environment.
Install the Mux appAnchor
Click here to install the Mux App on Hygraph, then follow these steps:
- Use the dropdowns to select which project and environment you want to install the app in, then click on
Install app. - The permissions pop-up will display. Click on
Authorize appto continue. You will be redirected to the configuration screen. - Fill in the
Access tokenand theToken secret. You can create these keys by navigating to Settings > Access Tokens in your Mux account.
You can only access this information in Mux if you have permissions to do so.
-
To be able to use the
Signed URLoption for your videos, you need to also fill in theSigning key IDand theBase64 private keyfields. You can create these keys by navigating to Settings > Signing keys in your Mux account. -
Use the radio buttons to select a
Default URL policy.Publicis selected by default, but you can also selectSigned. This option determines the default global setting for your Mux videos. You will have the option to overwrite this later on for each upload.If you don't complete the
Signing key IDand theBase64 private keyfields, theSignedoption will be disabled. A tooltip indicating this displays when you scroll overDefault URL policy.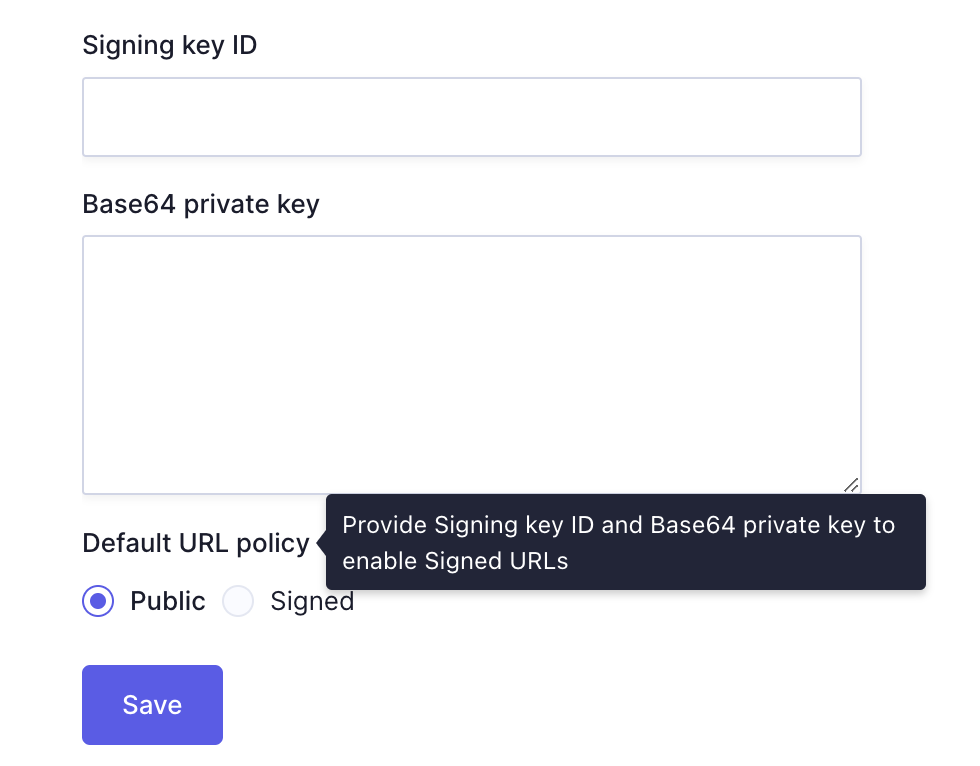
Mux - Signed URL disabled -
Click on the
Savebutton. A pop-up notification on the lower right corner of the screen will indicate that the changes have been saved.
Pro Tip
While you select the default URL policy for your project during app installation, please take into account that a user can overwrite this settings while creating content, as the video selection screen allows them to set a URL policy for each new upload.
Removing signed URL keysAnchor
If signed URL keys are removed from your project's app configuration after installation, videos that were previously uploaded using a signed URL will fail to load on the selection screen.
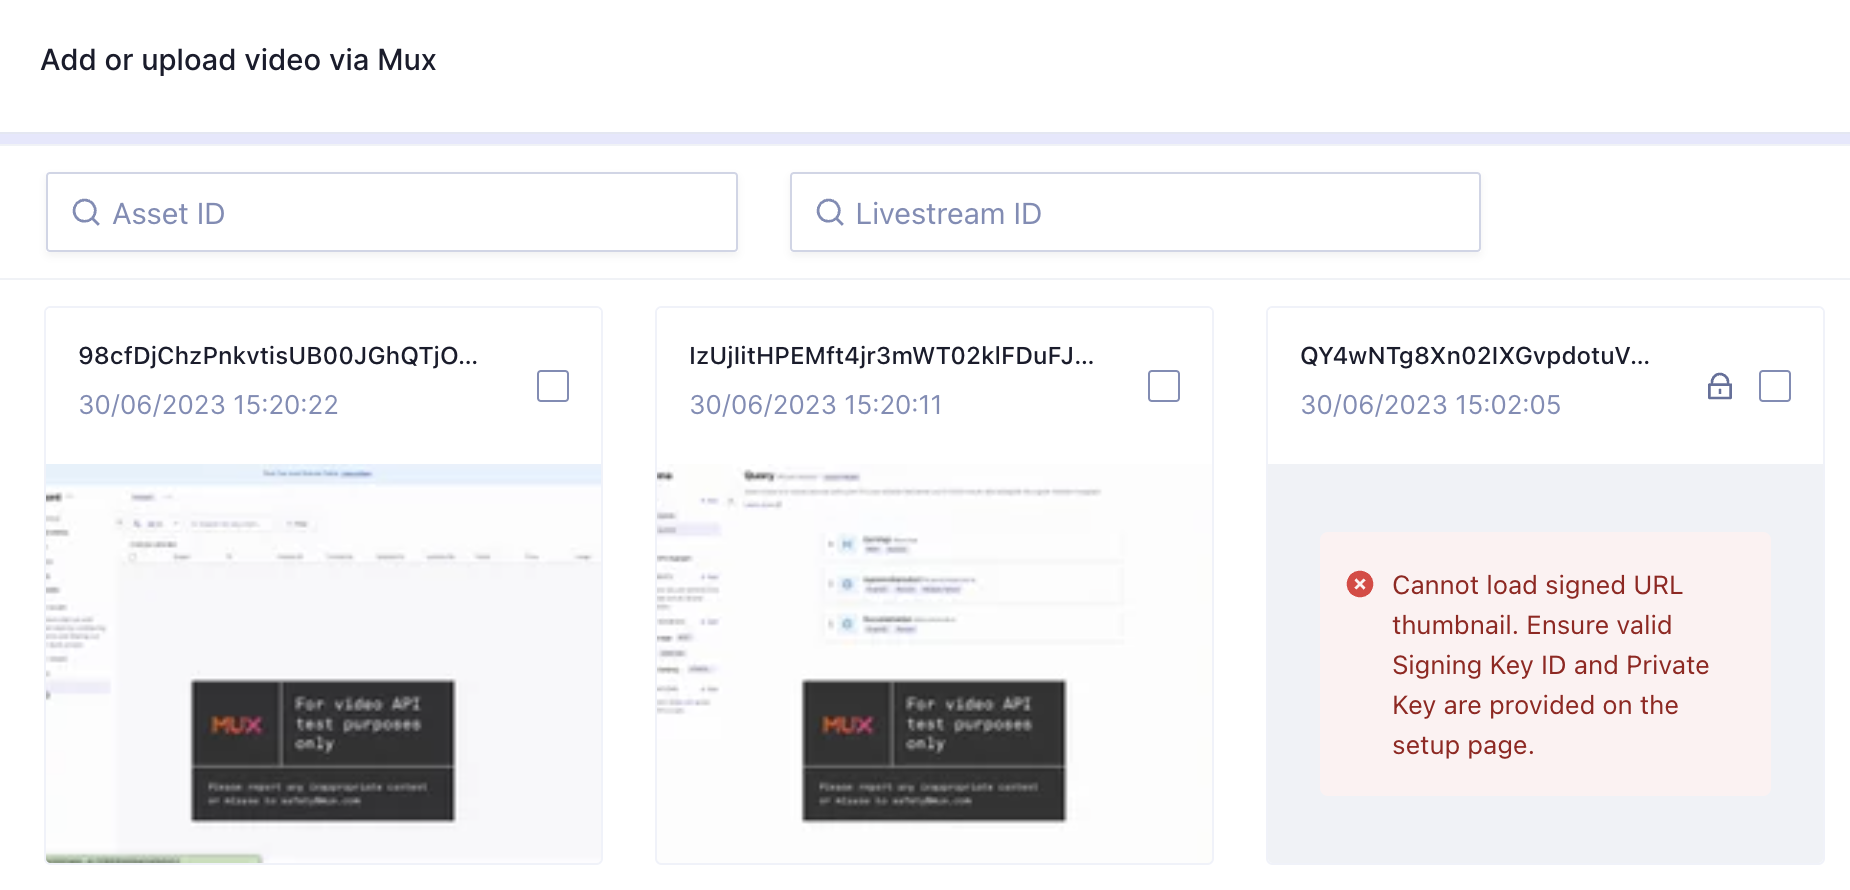
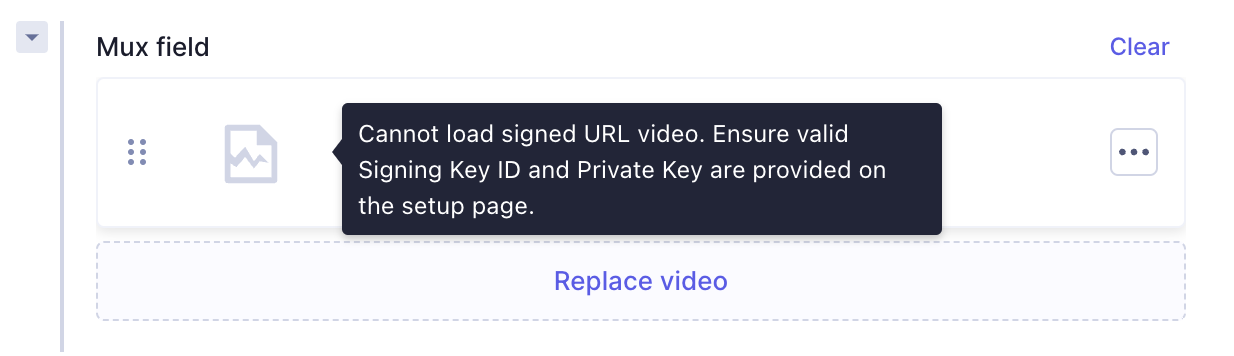
If added to a content entry, they will also fail to load in the content editor, and you will get a network error when attempting to play them. If you scroll over the thumbnail, a tooltip will display indicating that you need to provide valid signing keys for the video to load.
Add the Mux field to your modelAnchor
- Navigate to the Schema builder.
- Select the model that you would like to add the Mux field to and click on it.
- Select the Mux field from the Add fields right sidebar.
- Complete the
Display namefield, and theAPI IDwill be auto-filled by the system. Optionally, you can also add aDescription. - This screen also allows you to control different properties of your Mux field: you can allow multiple values, or you can localize the field, by selecting the checkboxes under the
Field optionssection of the screen. - Click on the
Addbutton.
Use Mux in your Hygraph projectAnchor
- Navigate to the Content editor.
- Select the view that you configured the Mux field for.
- Click on the
+ Add entrybutton or, alternatively, edit an existing entry by clicking on the pencil icon. - Locate the Mux field section of the screen and click on
Add or upload video via Mux. This opens a new screen where you can select an existing video or upload a new one. Check out our Mux selection screen document section to learn more about this step. - After selecting the video(s) you want and returning to the content entry, the selected video(s) will display on the list.
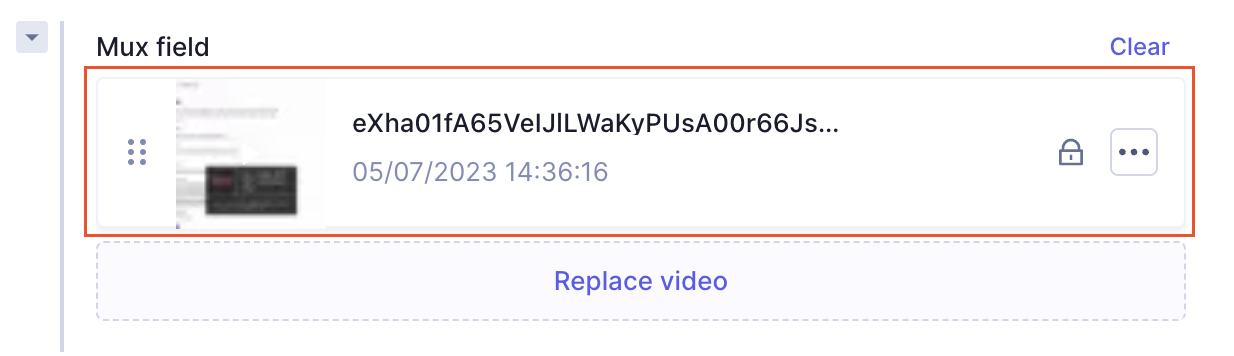
Mux - Videos in content entry - You can optionally use the six dots icon to drag and drop the videos to organize them in the order you want.
- Now that the video has been added to the entry, you can click on
SaveorSave & Publish, as needed.
Once added to the content entry, each video in the Mux field has a three dots context menu with the following options:
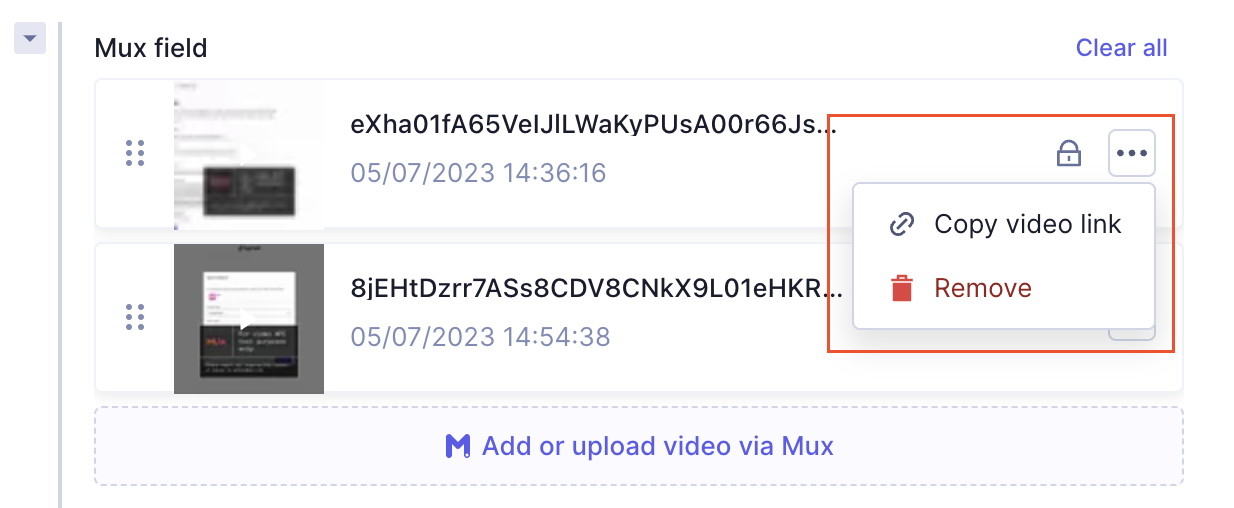
Copy link to video:Click on this option to copy the link to the video.Remove:Click on this option to remove the video from the list. If you want to remove all videos from the list, simply click on theClearlink located at the top right of the list.
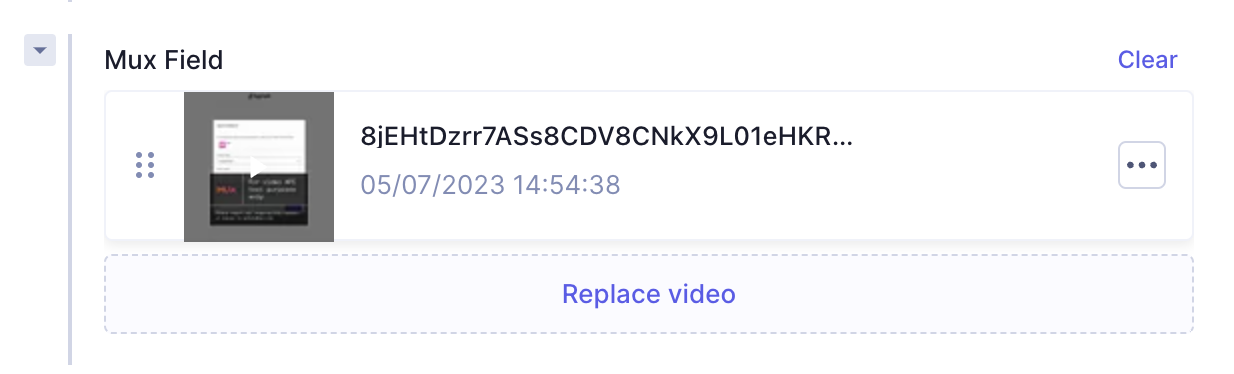
If your Mux field is configured to allow only one video, the Replace video button will display once you've added a video. Click on it to replace your video selection.
Mux selection screenAnchor
This screen pops up when you click on Add or upload video via Mux while creating or editing a content entry. Here you can select existing videos or upload new ones.
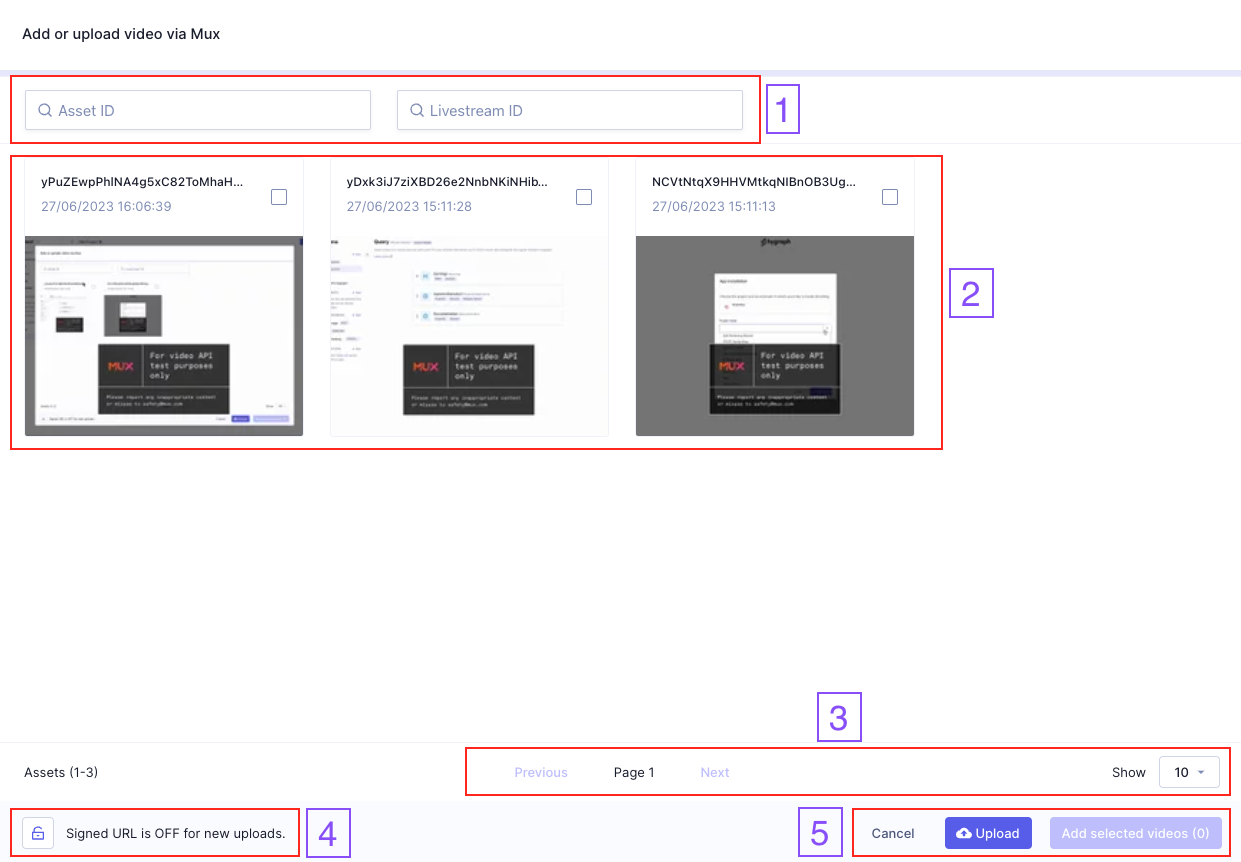
- You can use the filters at the top of the table to quickly find the videos you're looking for. You can filter by
Asset IDorLivestream ID. - If the Mux field in your project allows selecting multiple values, a selection checkbox will display next to each video. If the field only allows a single value, a selection icon will display instead, and the video will be added to the content entry when you click on that icon.
- You can use the pagination tools at the bottom of the screen to navigate the table.
- A button at the lower left corner of the screen allows you to select whether new uploads should be public or have a signed URL. The default state of this button depends on your
Default URL policyselection during installation. Videos with a signed URL display a lock icon at the upper right corner of the thumbnail.
Cancel: Click on this button to close the selection screen without adding a video to the content entry.Upload: Click on this button to upload a new video. URL Policy will reflect yourSigned URLselection in point4of this list. The videos are uploaded to your Mux account and display on the selection screen, where you have the option to select them and add them to a content entry.Add selected videos: Click on this button after selecting the videos you want to include in the content entry. A number between brackets to the right of the button indicates how many videos you selected. Selecting at least one video enables this button.
Select an existing videoAnchor
- Click on
Add or upload video via Muxin the Mux field section of the content editor to open the selection screen. - Here you have two options depending on field configuration:
- The field allows multiple values: Find the videos you want to add and select them using the checkboxes.
- The field does not allow multiple values: Find the video you want to add and click on the
Addicon, located at the top right of each video thumbnail.
- The final step also depends on field configuration:
- The field allows multiple values: Click on the
Add selected videosbutton to return to the content editor. The selected videos will display in your content entry as a result. - The field does not allow multiple values: You will be redirected to the content editor automatically after clicking on the selection icon in the previous step. You will find your selected video in the Mux field section of your content entry.
- The field allows multiple values: Click on the
You can repeat this process to add more videos if field configuration allows multiple entries, or you can click on Replace video if only one video is allowed and you want to change your selection.
Upload a new videoAnchor
- Click on
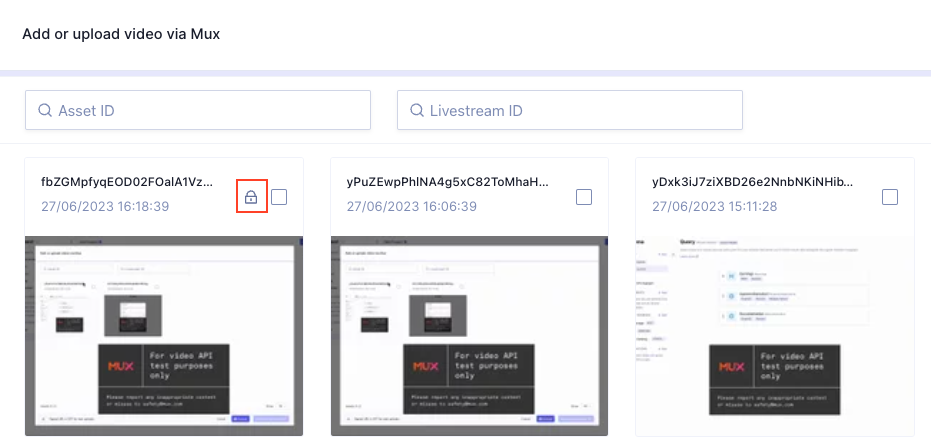
Add or upload video via Muxin the Mux field section of the content editor to open the selection screen. - Use the lock icon at the bottom left of the screen to select if the video should be
Publicor use aSigned URL. This option overwrites the global setting selected during installation, which is shown here as the default option.
Pro Tip
The signed URL option requires that you create a signing key in Mux, used to secure requests. You can create these keys in Settings > Signing Keys in your Mux account. Check out Mux's API documentation for Signing Keys if you want to know more.
-
Click on
Uploadat the lower right corner of the screen to upload new videos. -
A selection screen will pop up, where you can select one or multiple videos at the same time. Simply select them with a mouse click then click on
Upload.After uploading, the video displays on the selection screen along with the rest of your assets. Depending on how large your video file is, the thumbnail may take a few seconds to load.
-
To select this video and add it to your content entry, click on the selection icon or checkbox located at the upper right corner of the video thumbnail.
ResourcesAnchor
