Working with preview URLs
Preview URLs are automatically generated links that allow you to preview content in your frontend before it's published. Configuring this feature adds a button to the Content Editor's right sidebar, so editors can quickly access content previews.
Create a preview URLAnchor
- Navigate to the Schema builder.
- Select the model you'd like to create a preview URL for.
- Click on the sidebar tab, located at the top of the screen, under the title of the selected Model.
- Select the
Previewwidget from the right sidebar. - A screen will pop up, where you can complete the
Preview nameand theURL templatefields. This is where you can add your own website URL and specify how the preview slug should be constructed from field values in the content entry. You can add multiple preview URLs by clicking on the+ Add morebutton located at the bottom of the screen. So you could, for instance, add a preview URL for development and another for staging. Here you can find some information on how to define your own preview URLs. - Click on
Save.
Some templates, like our Docs Starter come with pre-configured preview URLs. In these cases, you'd need to edit an already created preview URL rather than create one from scratch. To edit a preview, simply navigate to the model that contains it, and click on the pencil icon located to the right of the widget.
If you then navigate to the Content Editor and access content that uses the model where you included the preview URL, you will be able to see the link under the Preview menu in the right sidebar. Click on this link to access the preview.

If you configured more than one preview URL for that model, you will be able to select the one you want by using the dropdown.
Delete a preview URLAnchor

- Navigate to the Schema builder.
- Select the model that contains the preview URL that you want to delete.
- Click on the pencil icon of the preview URL widget to edit it.
- Click on the trash icon located at the end of the line of the preview URL that you want to eliminate.
- Click on
Save.
The preview URL screen must contain at least one preview URL. If the screen contains only one preview URL and you delete it, attempting to save will result in a validation error.
If you only have one preview URL configured and you need to delete it, you must do so directly from the sidebar tab of the selected model. Note than in this case you will need to add the preview URL widget again if you need to use it in the future.
How to define a preview URLAnchor
During the process of creating a preview URL, you will be prompted to complete the Preview name and the URL template fields. Complete the Preview name field with a name that will help you identify the preview URL in the Content Editor later.
The URL template field is where you will define how the URL should be built, using field values from the content entry. The exact way each preview URL will be built will depend on your website's URL structure. Typically, you will start with your domain, then a section such as a blog. Finally, you will use handlebars notation to include a field that is unique to the content you want to preview, to be used as an identifier.
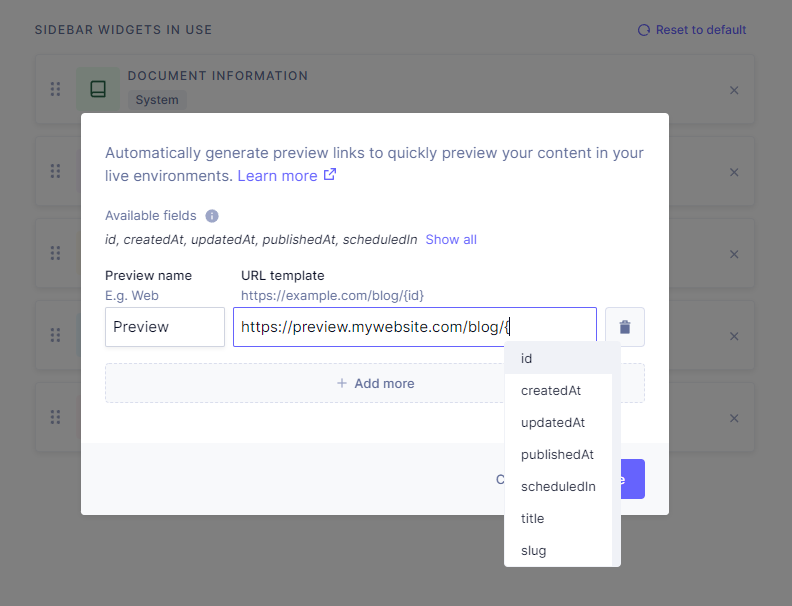
As soon as you type in the open curly brace, a list will display showing all the available fields - also included above under the Available fields screen section. You can use more than one of the available fields, if needed.
There needs to be a website running at the URL you entered for it to work. This feature simply creates a shortcut to link to that content directly from your Content Editor.
If you are generating a preview, always make sure that preview URLs pull content from the draft stage and not from published. Otherwise your previews won't include any unpublished changes.
ResourcesAnchor
- Docs Starter: Here you can find an example project where this feature is used. You can also access more information about our Docs Starter here.
- Tutorial: How to Create a Preview Mode with Remix and Hygraph.
